Wednesday, February 6, 2013
New Stampin'Up! Service: Paper Pumpkins
New from Stampin' Up!
I'm Paper Pumpkin . . .
I come to your door each month (a fully decked-out creativity carriage). I'll help you to escape your life with some paper fun.
I come in a sweet box, but you'll really love what you find on the inside:
All the stamps, ink, paper, and accessories to create pinable projects. Create stuff like cards, journals, décor, and more!
Paper Pumpkin by Stampin' Up! is a new monthly kit program that anyone (even you) can enjoy!
Get Started
It's so easy to get started. Simply sign up for the program starting Monday, January 14 by visiting www.mypaperpumpkin.com and click Get it. Every month a new, surprise project kit arrives at your doorstep. Just think of the anticipation of creating a fun project to pin, showoff, and share with your friends and family-every month!
The very first Paper Pumpkin will arrive on your doorstep starting in March-if you sign up before March 10.
Of course, you'll want to know more. So here's the nitty gritty:
Each month we send you a unique, surprise kit with a project-cards, journals, décor, and more! (We've even color-coordinated, measured, and cut everything for you!)
Each kit includes stamps, ink, paper, and accessories-everything but adhesive.
Each kit gives you and your customer a 30-minute creativity escape.
We will ship your Paper Pumpkin on or around the 15th of the month.
You need to sign up for a kit by the 10th of the month to get that month's kit. If you sign up on the 11th of the month, your first kit will come the next month. (Let's say you sign up on May 10th, we'll send your kit around May 15th. If you sign up on May 11th, we'll send your first kit around June 15th.)
A Paper Pumpkin membership is $19.95 per month (and shipping is included!)
There's no commitment, you can cancel your monthly Paper Pumpkin at anytime. You can also skip a month if you want.
Starting in early March, we'll offer a Try-It kit if you'd like to try Paper Pumpkin for one month.
Here's How You Order
Sign up for your monthly Paper Pumpkin starting Monday, January 14 by visiting www.mypaperpumpkin.com and click Get it. ( remember to add me as your demonstrator Jessica Deltoro)
Starting in early March, you can try Paper Pumpkin for one month by visiting our online store.
A Free Gift in Your Very First Kit
The Welcome Kit is the very first Paper Pumpkin you will receive in your first month of membership. The Welcome Kit includes a free gift-a clear acrylic block!
Questions? We've Got Answers
Why are we offering Paper Pumpkin?
Paper Pumpkin is the perfect introduction to Stampin' Up! We designed it for crafters that want to create a project each month, but aren't quite ready to build a stamp collection (yet).
How does shipping work with Paper Pumpkin?
Your Paper Pumpkin will be automatically shipped to you each month (so fun!). Because we are auto shipping these, the pricing structure is slightly different from our other Stampin' Up! products.
Wednesday, June 20, 2012
Color Coach Challenge: Pacific Point
Welcome to another week of color coach challenge. Every week the girls from the Sunny Morning Chat are choosing a color from the color coach and following the suggested color combination.
The color this week is Pacific Point. You saw Carol's take on Pacific Point on Carol's Blog.
Here is my take on Pacific Point:
I hope you are inspired to try using the farbic on you scrapbook pages. It works just like paper :)
Thanks for looking.
Next is Liz's Blog
The color this week is Pacific Point. You saw Carol's take on Pacific Point on Carol's Blog.
Here is my take on Pacific Point:
| I used Pacific Point, Daffodil Delight and Rich Razzleberry. |
| I used the fabric from the Floral District collection for the Rich Razzleberry circles. The circles were created by simply running the fabric through the Big Shot. The cut the fabric smoothly. |
| My stamp set is Circle Circus. I used the stamp set to stamp the background. |
I hope you are inspired to try using the farbic on you scrapbook pages. It works just like paper :)
Thanks for looking.
Next is Liz's Blog
Thursday, June 14, 2012
Fabric: Creating elements on a card
I am falling in love with the Stampin'Up! fabric. I will admit that when Stampin' Up! said they were introducing a fabric line I thought they were nuts.
During Sale-A-Bration this year I decided to order the Flirtatous fabric offered; it was free so i figured no harm no foul. When my daughter saw the fabric she went bananas for it. She wanted make all sorts of things with it. Now I can't get enough of it.
Here are two of the cards we made in the Fabric Card Class:
This is the fabric I used on this project:
Here are the directions on How to create the card embellishments.
Thanks for looking.
During Sale-A-Bration this year I decided to order the Flirtatous fabric offered; it was free so i figured no harm no foul. When my daughter saw the fabric she went bananas for it. She wanted make all sorts of things with it. Now I can't get enough of it.
I decided that I would dedicate June to trying new things.
New catty- new classes :)
Here are two of the cards we made in the Fabric Card Class:
This is the fabric I used on this project:
| Floral District Designer Fabric | 126893 |
| Price: $9.95 | |
| 3 extra-wide fat quarters (27" x 18"): 3 coordinated designs. Cut with select Big Shot dies. Coordinates with the Floral District suite. Daffodil Delight, Lucky Limeade, Rich Razzleberry, Tangerine Tango, Whisper White. | |
Here are the directions on How to create the card embellishments.
Thanks for looking.
Wednesday, June 13, 2012
Color Coach Challenge: Rich Razzleberry
Hello,
One more week of the color coach challenge. I hope you enjoyed Carol's blog.
This week the color was Rich Razzleberry. We could combine it with Pumpkin Pie and Old Olive or Pretty in Pink and Early Espresso. Since I can not turn down anything to do with coffee ;) I choose the second option.
I looked at this for a long time before inspiration hit :) Finally, I decided to use the Rich Razzleberry as my base and work from there.
Here is what I came up with:
The stamp set I used is Papaya Collage, it is new and I really like it. I think I will add some more fabric flowers- this guy seems lonely :)
Thanks for looking. Now enjoy Liz's creation :)
One more week of the color coach challenge. I hope you enjoyed Carol's blog.
This week the color was Rich Razzleberry. We could combine it with Pumpkin Pie and Old Olive or Pretty in Pink and Early Espresso. Since I can not turn down anything to do with coffee ;) I choose the second option.
| I started off by looking for everything I own in these colors. I have been using the fabric a lot lately and wanted to use that for sure. I also had buttons, brads, and markers in these colors. |
I looked at this for a long time before inspiration hit :) Finally, I decided to use the Rich Razzleberry as my base and work from there.
Here is what I came up with:
The stamp set I used is Papaya Collage, it is new and I really like it. I think I will add some more fabric flowers- this guy seems lonely :)
Thanks for looking. Now enjoy Liz's creation :)
Wednesday, June 6, 2012
Color Coach Blog Hop: Real Red
You are coming from Amanda's Blog. A group of us morning chatters over at Butternut Sage Designs
have been using the color coach to expand our color horizons.
This week's challenge is REAL RED! We could either use Bashful Blue and Crumb Cake, or Early Espresso and Pumpkin Pie...
Here is my take on Real Red, Early espresso, and Pumpkin Pie:
After I print the page I plan on adding some journaling and embellishments. That's the beauty of the hybrid scrapbook page :)
This week's challenge is REAL RED! We could either use Bashful Blue and Crumb Cake, or Early Espresso and Pumpkin Pie...
Here is my take on Real Red, Early espresso, and Pumpkin Pie:
![]() |
| I used My Digital Studio to create this page. I love MDS. |
Be sure to keep hopping! Here is Liz's Blog. Enjoy.
Friday, May 25, 2012
Red, White and Blue Chat Challenge
The ladies from Sunny Morning Chat Group at Butternut Sage Design have given us a RED, White and Blue challenge.
Here is my take on it:
Thanks for looking.
Here is my take on it:
![]() |
| I made this using My Digital Studio |
Thanks for looking.
Wednesday, May 23, 2012
Color Coach Blog Hop: Melon Mambo
Welcome to my blog. I am participating in my first blog hop, I am so excited.
This blog hop is about using the color coach and this week's color is Melon Mambo. The color coach gives you ideas for color combinations using Stampin' Up! card stock. I love my color coach and I refer to it every time I have a creative block :)
I am using the combination of Melon Mambo, Old Olive and Elegant Eggplant. The stamp set is Mixed Bunch.
These are the other participants in the hop.
Robbie - http://inkedx2.blogspot.com/
Amanda - http://www.ourcraftyplaydate. blogspot.com/
Jessica - http:// stampandscrapwithjessica. blogspot.com/ You are here :)
Pam - http://www.goldstarcreations. blogspot.com/
Sandy - http://www.icemountaindesigns. blogspot.com/
Teri - http://teribstampin.blogspot. com/
Tracy - http://luv4stampin.blogspot. com/
| My color coach. |
I am using the combination of Melon Mambo, Old Olive and Elegant Eggplant. The stamp set is Mixed Bunch.
| I created a scrapbook layout using the color combination from the color coach. |
| Here is a close up of the flowers and the "lattice". I used the Simply Scored tool for the lattice. I was going to add leaves but I forgot :) |
Thanks for looking. Pam's Blog is next. Enjoy :)
Robbie - http://inkedx2.blogspot.com/
Amanda - http://www.ourcraftyplaydate.
Jessica - http://
Pam - http://www.goldstarcreations.
Sandy - http://www.icemountaindesigns.
Teri - http://teribstampin.blogspot.
Tracy - http://luv4stampin.blogspot.
Friday, April 20, 2012
April Earth Day Projects
So I decided that to celebrate Earth Day I would find things around the house and scraps that I had and create use them on my cards and scrapbook pages.
Turns out I have hundreds of used dryer sheets in my house. I usually use then to dust and remove glitter from my craft table. I had so many I figured why not try crafting with them. I cut three circles out of the dryer sheet. I used a stamping sponge to sponge color on one of the circles. I used the colored circle in the middle and held all three pieces together with a brad. I used a dimensional to attach it the card. Super cute and it smells good.
It was a nice way to use up my scraps and super easy.
Again, super easy and a great way to use up stuff I horde, I mean store :)
Thanks for looking. Happy Earth Day.
| I gathered scrap paper, old magazines, and used dryer sheets |
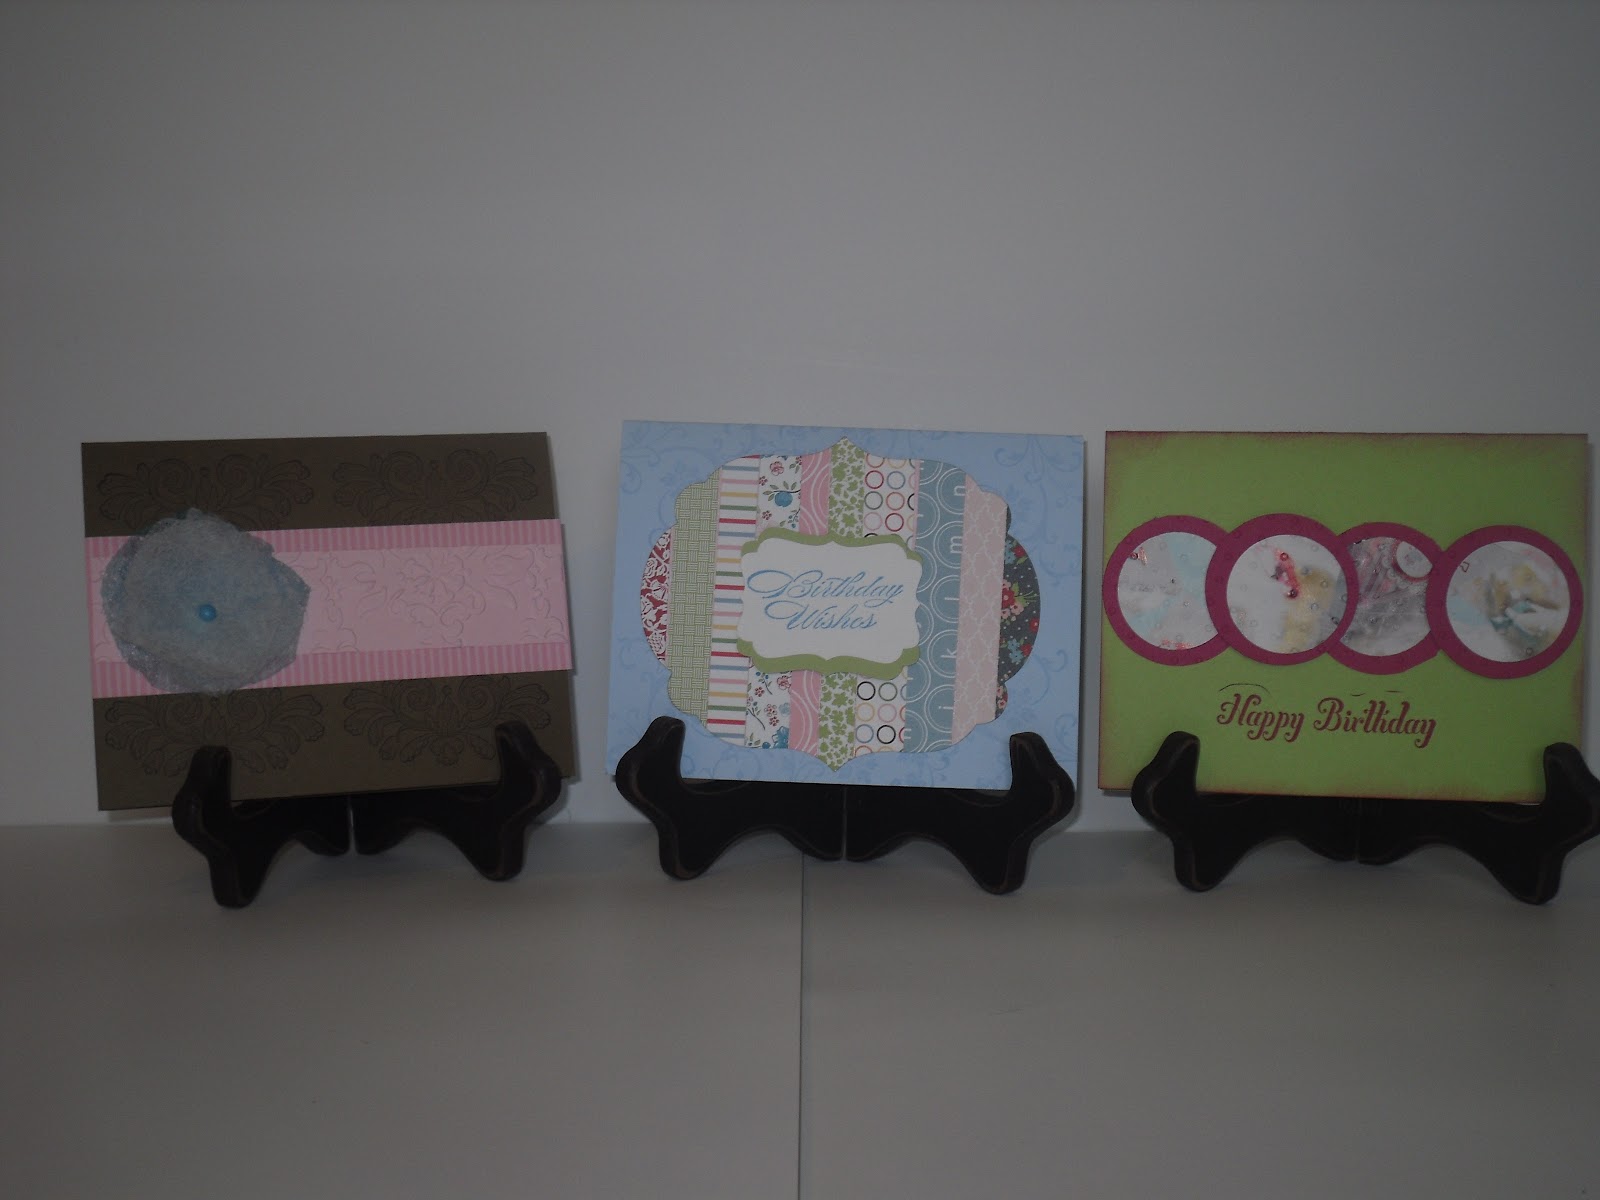
| In my card class we made 3 cards |
| I used the dryer sheet to make the flower on this card |
| We made the frame for this card using the scraps I had left from other projects. |
| First I cut the scrap into stripes and adhered them to a piece of card stock 4 1/4 x 5/1//2 |
| Then I ran ran it thru the Big Shot using the framelits. |
| For this card I used the magazine to punch out circles and then I matted them on extra card stock. |
It was a nice way to use up my scraps and super easy.
Again, super easy and a great way to use up stuff I horde, I mean store :)
Thanks for looking. Happy Earth Day.
April Earth Day Projects
So I decided that to celebrate Earth Day I would find things around the
house and scraps that I had and create use them on my cards and
scrapbook pages.
Here is the first set of scrapbook pages I made .
Easy peasy, and it was all stuff I already had collecting dust; now it has a purpose :)
The next set of pages use dryer sheets and scrap paper.
I cut three circles out of the dryer sheet. I used a stamping sponge to add color to one of the circles. I layered the circles with the inked circle in the middle and then used a brad to hold it together. They are super cute and smell great!!!!
Thanks for looking. Happy Earth Day!!!!!
| I gathered scrap paper, old magazines, and used dryer sheets |
Here is the first set of scrapbook pages I made .
| I used the scrap paper to punch circles |
| I used the circles to create the border and use what was left the paper for the block. |
| I also had ribbon I wasn't using and two pieces left from a pack of 8 1/2 x 11 cardstock so I used to make the mats. |
The next set of pages use dryer sheets and scrap paper.
| I used the nature stamp set because it is Earth Day :) |
| I used scraps I had from another project to create all borders. It was just enough paper to cut into strips. |
| This border punch doesn't need a lot paper, but it creates a big impact. |
| I made the flowers using dryer sheets |
Thanks for looking. Happy Earth Day!!!!!
Friday, March 30, 2012
Stamping Kids Class: Happy Easter!!!!
I focused the month of March on Easter. The stamping kids created Easter baskets and Easter cards. Here is what they made.
Thanks for looking.
| The kids had a great time. They all wanted to eat the peeps :) |
| We used the Good Egg Stamp Set, this set is retired. However, it is available as an MDS digital download. The kids used the watercolor pencils to color the egg. |
| This card was created using the Crosses of Hope and Elements of Style stamp sets. |
| We used a 6x6 paper to create the little basket. Scoring was super easy using the Simply Score tool. |
| We created the topper using the top note die for the big shot. The little bags we used are also from Stampin' Up! |
Thanks for looking.
Friday, March 23, 2012
MDS: Scrapbook Alexandra's 7th Birthday
Trying to get back into the blogging habit. Here is the scrapbook page I made with My Digital Studio. I am proud to say that this page is done using ONLY stamps and papers that come with the program.
Thanks for looking.
Thanks for looking.
Friday, March 16, 2012
Green Challenge at Butternut Sage
Hello, it's been a while since I have posted anything. I saw this challenge at Butternut Sage and thought maybe this will get my blogging mojo going again.
Here is my interpretation of green.
Of course my scrapbook pages are created in My Digital Studio, which I love.
Thanks for looking. Hopefully I will update the rest of blog this weekend :)
Here is my interpretation of green.
Of course my scrapbook pages are created in My Digital Studio, which I love.
Thanks for looking. Hopefully I will update the rest of blog this weekend :)
Monday, August 8, 2011
I have been MIA
Hello,
Some people have been asking where my blogging has gone. I have been taking a little break. May and June were busy with my son's Communion and my daughter's kindergarten graduation. Then they are off from school, so I have been running around from camps to work and home. Do not fear, I still have been scrap booking, stamping and playing with My Digital Studio. I do have tons of great things to show you. I will be back in about two weeks. Enjoy the rest of your summer. See you guys soon :)
Thursday, May 19, 2011
MDS Thursday: Photo Box Effects
I am still focusing on the photo box feature of My Digital Studio. This week I was playing with the photo effects and dicovered how easy it is to create black and white photos.
Here is my page:
I love that I was able to make the picture black and white without editing them in another program (which is what I usually do)
"How did I do it?" you ask. Well . . .
Here is my original page:
After looking at all the options, I decided on black and white.
This page will be a hybrid page, so it is not finished. I will add ribbon and journaling when I print it.
Thanks for looking.
(Don't worry I will not ignore the other effects, I already have layouts in my head for them, he, he, he )
Here is my page:
I love that I was able to make the picture black and white without editing them in another program (which is what I usually do)
"How did I do it?" you ask. Well . . .
Here is my original page:
![]() |
| When I was done with the page, I thought it's nice but I want something more. I wanted that "Wow, you did that" moment. |
![]() |
| As I looked on the page, I noticed an icon I had never pressed before. It was the Photo Effects icon, so I pressed it. (see red circles) |
![]() |
| Imagine my excitement when I read, black and white, sepia, blue, etc... I clicked every one of them. |
And Ta Da!!!!! Black and white picture.
This page will be a hybrid page, so it is not finished. I will add ribbon and journaling when I print it.
Thanks for looking.
(Don't worry I will not ignore the other effects, I already have layouts in my head for them, he, he, he )
Tuesday, May 17, 2011
May Scrapbook Class
Our monthly scrapbook class meet and we made some cute layouts.
This first layout was a choice of Melon Mambo (for girls) or Pacific Point (for boys)
The mats are
4 1/4 x 5 1/2 and 3 1/2 squares.
I used:
Stamp Set: Party Hearty
ink: Melon Mambo, Pretty in Pink
card stock: Whisper White, Melon Mambo, Pretty in Pink
punches: scallop edge
The DSP for this layout is Beyond the Garden in the Summer Mini Catalog.
Get scrapping. Thanks for looking.
Here is the first scrapbook lay-out we made:
This first layout was a choice of Melon Mambo (for girls) or Pacific Point (for boys)
My favorite part of this layout is that there are 10 spots for pictures and journaling.
The mats are
4 1/4 x 5 1/2 and 3 1/2 squares.
I used:
Stamp Set: Party Hearty
ink: Melon Mambo, Pretty in Pink
card stock: Whisper White, Melon Mambo, Pretty in Pink
punches: scallop edge
Here is the second layout we made:
The DSP for this layout is Beyond the Garden in the Summer Mini Catalog.
Get scrapping. Thanks for looking.
Subscribe to:
Posts (Atom)