Hello,
Some people have been asking where my blogging has gone. I have been taking a little break. May and June were busy with my son's Communion and my daughter's kindergarten graduation. Then they are off from school, so I have been running around from camps to work and home. Do not fear, I still have been scrap booking, stamping and playing with My Digital Studio. I do have tons of great things to show you. I will be back in about two weeks. Enjoy the rest of your summer. See you guys soon :)

Monday, August 8, 2011

Thursday, May 19, 2011
MDS Thursday: Photo Box Effects
I am still focusing on the photo box feature of My Digital Studio. This week I was playing with the photo effects and dicovered how easy it is to create black and white photos.
Here is my page:

I love that I was able to make the picture black and white without editing them in another program (which is what I usually do)
"How did I do it?" you ask. Well . . .
Here is my original page:
After looking at all the options, I decided on black and white.

This page will be a hybrid page, so it is not finished. I will add ribbon and journaling when I print it.
Thanks for looking.
(Don't worry I will not ignore the other effects, I already have layouts in my head for them, he, he, he )
Here is my page:

I love that I was able to make the picture black and white without editing them in another program (which is what I usually do)
"How did I do it?" you ask. Well . . .
Here is my original page:
 |
| When I was done with the page, I thought it's nice but I want something more. I wanted that "Wow, you did that" moment. |
 |
| As I looked on the page, I noticed an icon I had never pressed before. It was the Photo Effects icon, so I pressed it. (see red circles) |
 |
| Imagine my excitement when I read, black and white, sepia, blue, etc... I clicked every one of them. |

And Ta Da!!!!! Black and white picture.
This page will be a hybrid page, so it is not finished. I will add ribbon and journaling when I print it.
Thanks for looking.
(Don't worry I will not ignore the other effects, I already have layouts in my head for them, he, he, he )
Tuesday, May 17, 2011
May Scrapbook Class
Our monthly scrapbook class meet and we made some cute layouts.
This first layout was a choice of Melon Mambo (for girls) or Pacific Point (for boys)


The mats are
4 1/4 x 5 1/2 and 3 1/2 squares.

I used:
Stamp Set: Party Hearty
ink: Melon Mambo, Pretty in Pink
card stock: Whisper White, Melon Mambo, Pretty in Pink
punches: scallop edge
The DSP for this layout is Beyond the Garden in the Summer Mini Catalog.


Get scrapping. Thanks for looking.
Here is the first scrapbook lay-out we made:
This first layout was a choice of Melon Mambo (for girls) or Pacific Point (for boys)

My favorite part of this layout is that there are 10 spots for pictures and journaling.

The mats are
4 1/4 x 5 1/2 and 3 1/2 squares.

I used:
Stamp Set: Party Hearty
ink: Melon Mambo, Pretty in Pink
card stock: Whisper White, Melon Mambo, Pretty in Pink
punches: scallop edge
Here is the second layout we made:
The DSP for this layout is Beyond the Garden in the Summer Mini Catalog.


Get scrapping. Thanks for looking.
Monday, May 16, 2011
MDS Thursday: Downloads
Blogger was having technical difficulties and was unable to post this on time, but here it is :)
I have recieved a lot of questions about downloading new stampe sets and kits, so I figured I would dedicate a post to it.
First, you can order downloads only from the the Stampin' Up! website. Second, it's easier if you are using the computer you are actually downloading to; this will save you time later looking for the download.
Hope this helps.
If you do this and you still can't find your download feel free to email me: stampingwithjessica@gmail.com
I have recieved a lot of questions about downloading new stampe sets and kits, so I figured I would dedicate a post to it.
First, you can order downloads only from the the Stampin' Up! website. Second, it's easier if you are using the computer you are actually downloading to; this will save you time later looking for the download.
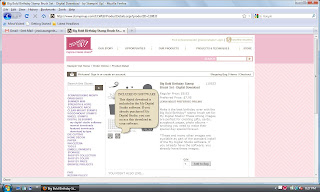 |
| When you pick a download, it will take you the "description" widow. It's important to know that the little icon will tell you if it came with the full My Digital Studio version you have already purchased. You don't want to buy something you already have. (This does not, however apply to the My Digital Studio Express version of the software.) |
 |
| The other icon tells you it is not part of the full My Digital Studio version. Therefore, it is new and you do not already have it. |
 |
| Once you have added it to your bag and purchased it, it will ask you to download now. Make sure you are doing this on the computer that has My Digital Studio installed. |
 |
| It will ask you if want to download for your PC or Mac,. it will also ask if you want to download to your MDS or other applications . Unless you are using this download in a program other than MDS, you should just download it for MDS. |
 |
| Follow the steps to download and save the file. |
 |
| Here is when you have to slow down and pay attention.. Your download will go to your download folder. It is very important you know where this folder is on your computer or you will not be able to "start/use" your download. |
 |
| Even though you have download, it will not show up in your MDS. |
 |
| Find your Computer icon either on your desktop or in your menu ( see red circles) |
 |
| Locate your Downloads folder and double click ( see red circles) |
 |
| This folder will open and show you everything you have downloaded. You want to double click on the download that has the name of what you just purchased for your MDS. Mine is shown in the red circles. |
 |
| This window will open for MDS. This is where it will actually "activate"your download. Follow the directions given. |
 |
| Make sure it is going into My Digital Studio. |
 |
| Now you are done. |
 |
| And Ta Da!!!!!!!When you restart your MDS, your new download is there. Remember if you order a kit/bundle, MDS separates the pieces into the categories where it belongs. For examples, the stamp sets got to stamp sets and DSP goes to card stock. It should all be in your designer kits. |
Hope this helps.
If you do this and you still can't find your download feel free to email me: stampingwithjessica@gmail.com
Friday, May 6, 2011
Nature Walk Stamp Set April Scrapbook Pages
For the month of April I focused my classes on the Nature Walk stamp set.
Here is the first layout we made:

I didn't make titles for these pages. I figured they are pretty general enough they can be used for anything.

I used one of the clear blocks to stamp the background. It created a distressed look.

The white background circles were created by stamping a background with the stamps and then using punches to make the circles. The other circles were punched from the Nature Walk DSP.
We made our own "DSP" so to speak, lol.
I used:
Card stock: Old Olive, Very Vanilla, Nature Walk DSP (no longer available)
Inks: Early Espresso, Marina Mist, Cherry Cobbler, So Saffron
Markers: Cherry Cobbler, Old Olive, Early Espresso
Here is the second layout we made:
 This is definitely one of my favorite layouts.
 The title background is hand stamped. I cut the sparrow out of the DSP and then I used blender pens to give it some life. The picture mats are 3 1/4 x 4 1/4 and 3 x 4.

The mats on this page are 5 1/4 x 5 1/4 and 5 x 5.
I used:
Card stock: Marina Mist, Whisper White, Nature Walk DSP (no longer available)
Inks: Early Espresso, Marina Mist, Cherry Cobbler, So Saffron
Markers: Cherry Cobbler, Old Olive, Early Espresso
Thanks for looking.
Here is the first layout we made:

I didn't make titles for these pages. I figured they are pretty general enough they can be used for anything.

I used one of the clear blocks to stamp the background. It created a distressed look.

The white background circles were created by stamping a background with the stamps and then using punches to make the circles. The other circles were punched from the Nature Walk DSP.
We made our own "DSP" so to speak, lol.
I used:
Card stock: Old Olive, Very Vanilla, Nature Walk DSP (no longer available)
Inks: Early Espresso, Marina Mist, Cherry Cobbler, So Saffron
Markers: Cherry Cobbler, Old Olive, Early Espresso
Here is the second layout we made:


The mats on this page are 5 1/4 x 5 1/4 and 5 x 5.
I used:
Card stock: Marina Mist, Whisper White, Nature Walk DSP (no longer available)
Inks: Early Espresso, Marina Mist, Cherry Cobbler, So Saffron
Markers: Cherry Cobbler, Old Olive, Early Espresso
Thanks for looking.
Thursday, May 5, 2011
MDS Thursday: Photo Box Circles
My next MDS class will focus on Photo Boxes, so I have been playing around with it to learn as much as I can.
The original purpose of photo boxes is to allow the user to insert photos easily in to the program, so I am going to start with some of the basic functions of photo boxes.
When you insert a photo Box into your layout it always starts out as a square. You can enlarge the square and turn it into a rectangle.
Check out this super simple way to add pizazz to your page.
Here is my initial scrapbook layout.

I like it the way it is, but I started to play with the tabs and discovered that I can turn the rectangles into ovals (if you have a square it will turn into a circle)

In the Design Center on the right of your screen is an option called Photo Shape (see red circle).
Click it once.
And Ta Da !!!!!!! it will change the shape from rectangle to oval or square to circle.
I like the ovals. I think it gives it a more "handmade" look.
Give it a try!! Thanks for looking.
The original purpose of photo boxes is to allow the user to insert photos easily in to the program, so I am going to start with some of the basic functions of photo boxes.
When you insert a photo Box into your layout it always starts out as a square. You can enlarge the square and turn it into a rectangle.
Check out this super simple way to add pizazz to your page.
Here is my initial scrapbook layout.

I like it the way it is, but I started to play with the tabs and discovered that I can turn the rectangles into ovals (if you have a square it will turn into a circle)

In the Design Center on the right of your screen is an option called Photo Shape (see red circle).
Click it once.
 |
| Finished Project |
And Ta Da !!!!!!! it will change the shape from rectangle to oval or square to circle.
I like the ovals. I think it gives it a more "handmade" look.
Give it a try!! Thanks for looking.
Monday, May 2, 2011
Downline Day Card Swap
Cindy, my upline, had a special card making day at her house for all of the members of her downline. We made some great cards using the Celebrations Simply Scrapping Kit. I am ordering a new kit to show my clients in June.
We also made some cards using the new Four Frames Stamp Set and the Paisley DSP. The set and the paper will be in the 2011-2012 catalog and they are beautiful.
There are no pictures because I am not sure about the rules of posting other peoples work, but trust me it was all great.
Part of the day was a card swap. Here is the card I swapped.

I really like this card because it is colorful and super simple.
Thanks for looking.
We also made some cards using the new Four Frames Stamp Set and the Paisley DSP. The set and the paper will be in the 2011-2012 catalog and they are beautiful.
There are no pictures because I am not sure about the rules of posting other peoples work, but trust me it was all great.
Part of the day was a card swap. Here is the card I swapped.

I really like this card because it is colorful and super simple.
Thanks for looking.
Subscribe to:
Posts (Atom)
