Wednesday, March 30, 2011

March Stamping Kids

Stampings kids theme this month was Spring.

They made 2 cards, 1 basket, and 1 treat card

They colored in the flowers using the watercolor pencils.  The candy almost didn't make it into the cups, lol.

The mothers loved this little basket so much they made one for themselves :)


I had fun with the kids.  They get very excited.


I used:
Stamp Set: Punches Posies and A Flower For All Seasons
Cardstock: So Saffron, Pacific Point, Bashful Blue, Whisper White
Big Shot, Fancy Favor Bigz Dies, Organza Ribbon, Flower Brads

Order here.

Thanks for looking.

Thursday, March 24, 2011

MDS Thursday: Ruffled Ribbon

I can not take credit for this trick, but  I love it and had to share it.
I made a quick card using it just so you can see the look, but I will be using this often.  So thank you Cindy Schuster.

How cute is the ribbon!!!


Check out the video tutorial Cindy created.


I am playing with this technique and I love it.

Go give it a try.  Thanks for looking.

Sunday, March 20, 2011

Hartford Regional 2011 Samples

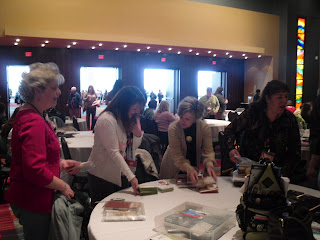
Here are some photos of the samples they had displayed.


Hartford Regional 2011

I had the opportunity to go the Hartford Region and boy was it fun!!!
I came back with tons of ideas and motivation.  They had Workshop Wows, which are ideas to Wow your clients.  They showed us different techniques with stamping.  They also had sample boards full of cards, pages and projects for us to get inspired.  It was a great experience, maybe one day I'll go to convention, which I heard is even better.

 Here are some photos:

Cindy(left)- my upline and hero and Janine( right) a fellow demo

Jackie (right) and me (left)


Thursday, March 17, 2011

March Scrapbook Class

Here are the scrapbook pages for this months club.  We usually make 1-2page layout, however this month we made 2- 2page layouts.


Our first layout was a spring layout.

This cardstock just yells spring to me.
The title was printed in MDS on glossy paper then I stamped the flowers

I didn't add any mats because I have so many spring pictures that I wanted to have space for later.

I used: 
Stamp Set: Punched Posies ( it was a hostess set and no longer available) 
Cardstock:  Tempting Turquoise, Sunny Garden Designer Series Paper
Ink:  Melon Mambo, Tempting Turquoise,Old Olive, Concord Crush 
Embellishments: Brights Buttons
The title was created in MDS and printed on glossy paper.


The second layout we made is birthday.

Birthday presents and candles
I like using stamps as background.  We cut some of the stamps to give it dimension.

Add caption

I used:

Stamp Set:  Party Hearty
Cardstock: So Saffron, and Celebrations DSP
Ink: Old Olive, Real Red
3/4" Circle Punch
Title is also printed from MDS


Thanks for looking.

Thursday, March 10, 2011

MDS Thursday: Drop Shadow

This week was my friend (and upline) Cindy's birthday, so I decided to use MDS to make her a birthday card.

Here is the card I made and emailed her:


This card was fun to make because it gave me a chance to play with drop shadow.  It was interesting to find out the different looks you can get using the drop shadow feature in MDS.  Drop shadow works the same way for stamps, photo boxes, embellishments and punches, so once you learn it you learn it for many things.


First, I choose a stamp.  This one is from the Together Forever SS.  Then choose the Drop Shadow box in the Design Center, see red circle.


When the Drop Shadow window opens you can change the Opacity, Blur, and Color of the Drop Shadow. (see red circles) The changes you make can be seen in the box where the stamp is displayed.


NOW THIS IS THE REALLY COOL PART!!!    Hold down your pointer in the display box and you can move, yes move the shadow around. (see red circle) It's awesome!!!!!


Once you have placed the shadow where you like, click ok.

And Ta Da!!!!!  You have a shadow.  It looks like you are sponging the edges.


To create the shadow on the other side, I copied and pasted ( in place, not off set) the stamp and just moved the shadow to the other side of the stamp.

Go give it a try.  Thanks for looking.

Thursday, March 3, 2011

MDS Thursday: Man That Was Easy: Creating an Embossed Look.

When I create cards or scrappages, I sometimes like to create embossed backgrounds. I wanted to do that on this basketball page for my son. Usually, I just grab my stamp set, versamark ink pad, and clear embossing powder and stamp away, but how do I create that digitally.

It was SO easy, I had to share.

Here is the page I created:


I used the All Star stamp to create an emboosed look on the background of the page.
Here is how I did it:


 Start by choosing a background color.  I am using Baja Breeze.


Then choose a stamp.  I am using the All Star stamp in the Sporting Stamp Set.


I resized the stamp and then clicked on Change Color in the Design Center.  I choose the same Baja Breeze as the background.


 Your stamp will disappear into the background.  Go to the Design Center and click on the Drop Shadow.  Set the Blur to none, the Opacity to about 50, and the color should stay black.  Click OK.

(Feel free to play with opacity setting to create different depth.)


And TA DA!!!!! It looks like you embossed the stamp.

Here is another background I created for my son's scrapbook.


Go give it a try.  Thanks for looking.

Tuesday, March 1, 2011

March Monthly Card Swap

 On the first of every month myself and 12 other send out cards to each other.  I feel like a kid waiting for the cards to start coming in the mail.

Here is the card I sent out for the monthly card swap I joined.


Thanks for looking.
Related Posts Plugin for WordPress, Blogger...