I love when something looks complicated but is actually very easy.
The "hard" part of this card is the flowers. The truth is they were the easy part.
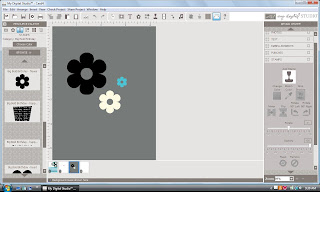 |
| Big Bold Birthday Stamp Set |
I started by stamping, resizing and coloring the three flowers. I used the flower from the Big Bold Birthday stamp set. This stamp set comes with the program. ( I used a gray background so you can see the white flower)
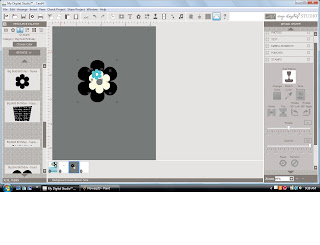 |
| Stack the flowers together |
I wanted it to look like one flower so I stacked them. Then, because I am a perfectionist, I wanted them to be exactly center of one another. I looked a little foolish trying to measure each side, moving a bit here, a bit there. After some frustrating moments I gave up and started to look for an easier way. This is a digital software after all, shouldn't it do this for me :)
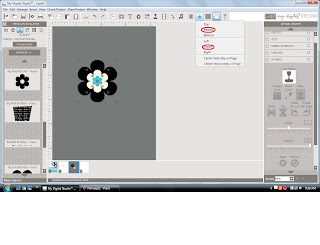 |
| Using the Alignment Feature |
The alignment feature to the rescue.
First, you have to select all three stamped images.
1. click on the first stamped image
2. hold the shift key
3. click the remaining objects, while still holding the shift key
Notice how the three objects are highlighted.
Once you've highlighted the stamped images, click on alighment and click middle and then center. It's actually kinda
fun watching the flowers move on there own. (see red circles)
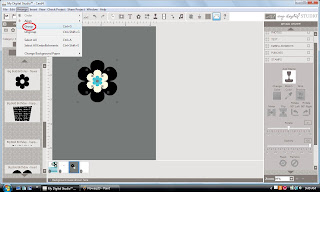 |
| Group the Stamped Images |
We are almost done.
Once the flowers are all set, you have to group them. This will turn them into one stamped image instead of three.
To group the stamped images:
1. make sure the three stamped images are highlighted ( just like before)
2. go to the Arrange tab in the menu bar
3. press Group (see red circle)
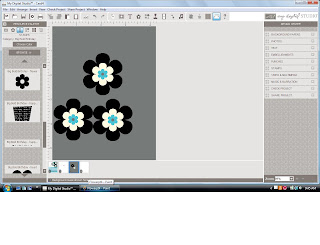 |
| A flower is born |
And, Ta Da!!!!! You have a complete flower.
You can copy and paste as many as you like. The one thing you can not do is resize it. I am hoping that MDS will have an update for that soon.
Give it a try. Thanks for looking.


